
Have we all fallen in love with the Teddy Bear Parade cartridge or what?! I was never even a teddy bear kind of kid, but this little cartridge is so much fun to use!
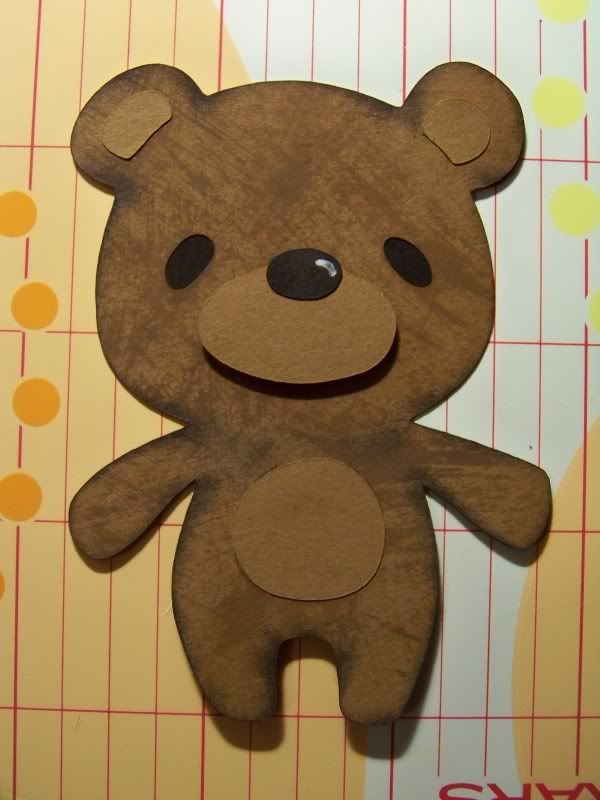
Speaking of fun.... Before I started this card set, I had a little fun just making some bears. I wanted to play with how to make them look different, dimensional, textured. The most obvious thing is flocking powder, but in my extreme cheapness, I only had flocking powder that I picked up on clearance-- and not a bear color in the bunch! That forced me to be creative.
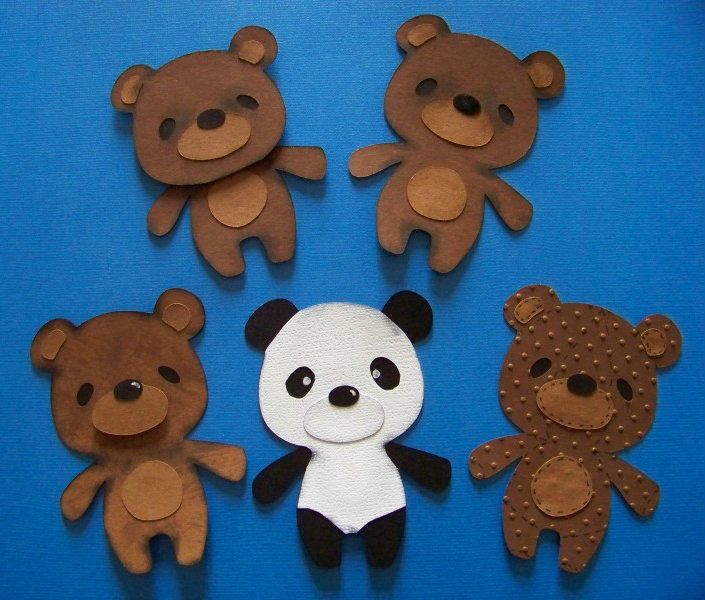 |
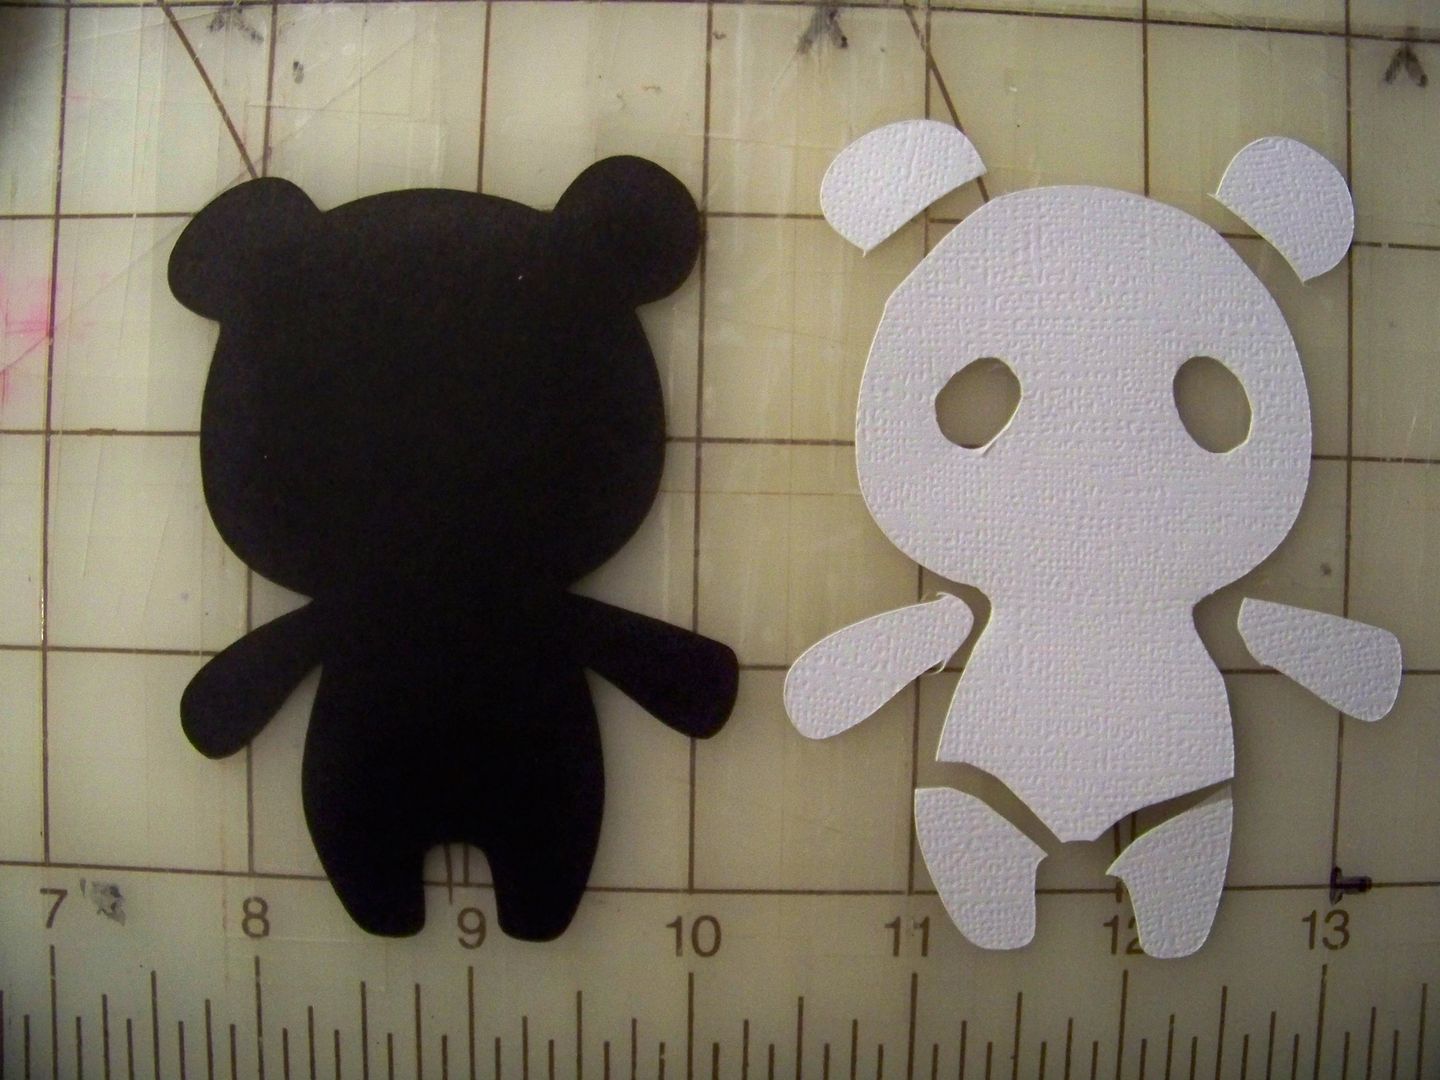
| Top (starting from left): Bear inked in brown and black with head cut and reapplied, Bear inked in brown and black with a Glossy Accents nose. Bottom (starting from Left): Bear dry-brushed with brown acrylic paint with white accent on nose and popped up snout, Panda bear made from hand-altering white layer, Bear embossed with Cuttlebug Swiss Dots and hand-drawn stitching to look like a toy |
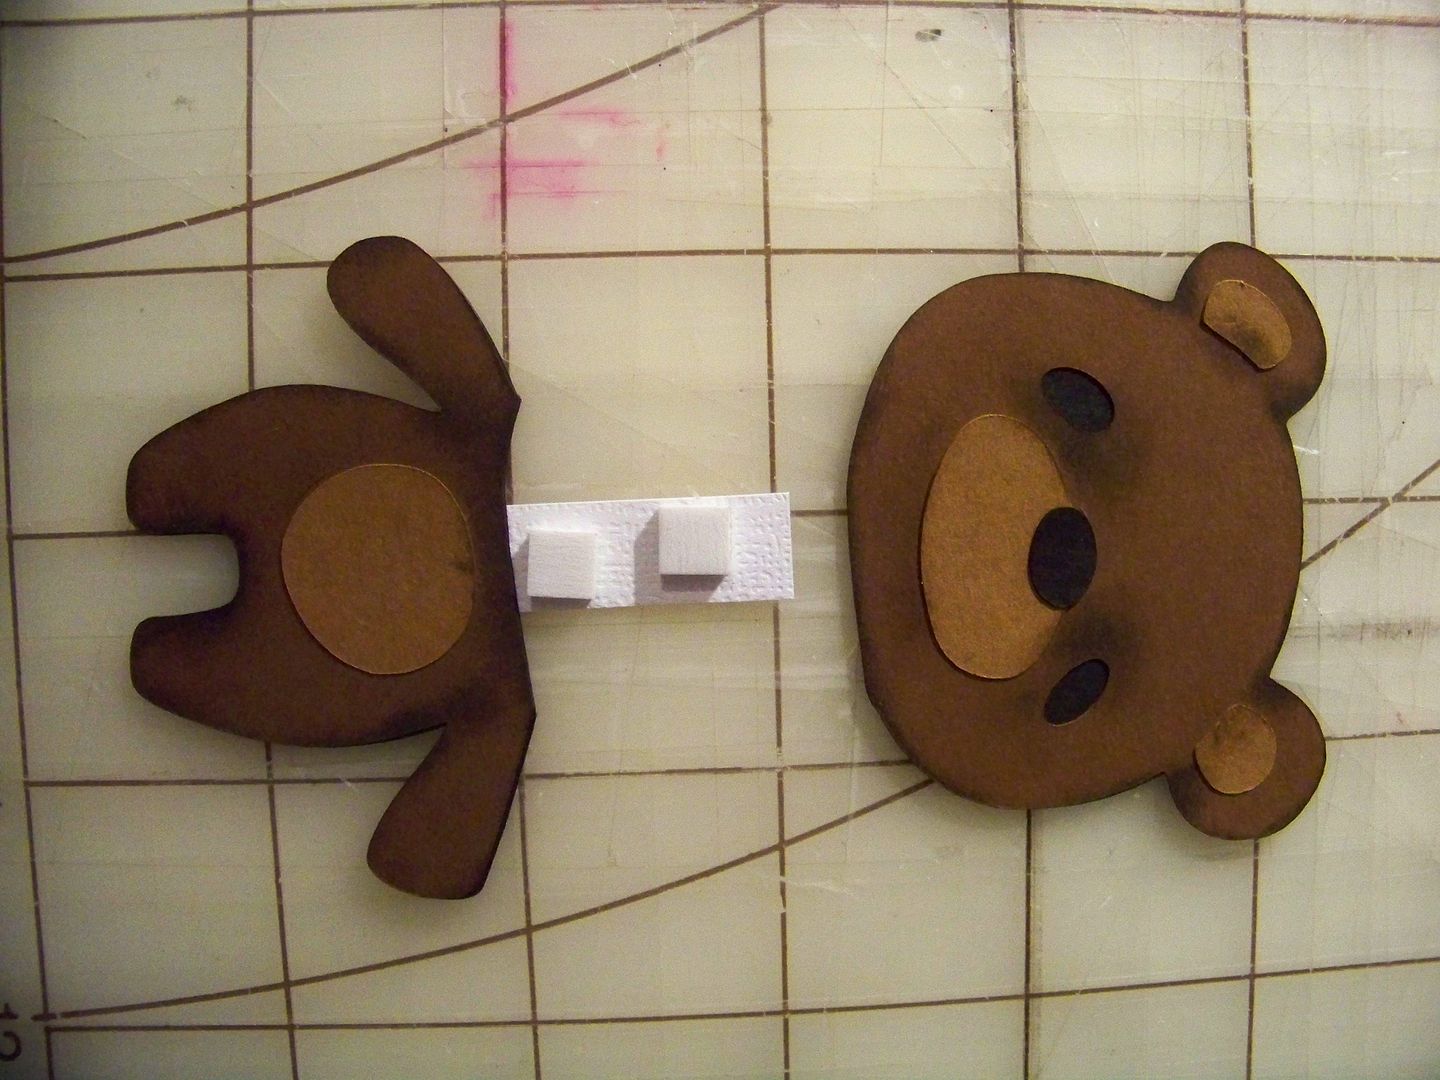
For reapplying a head, I added a hidden modification...
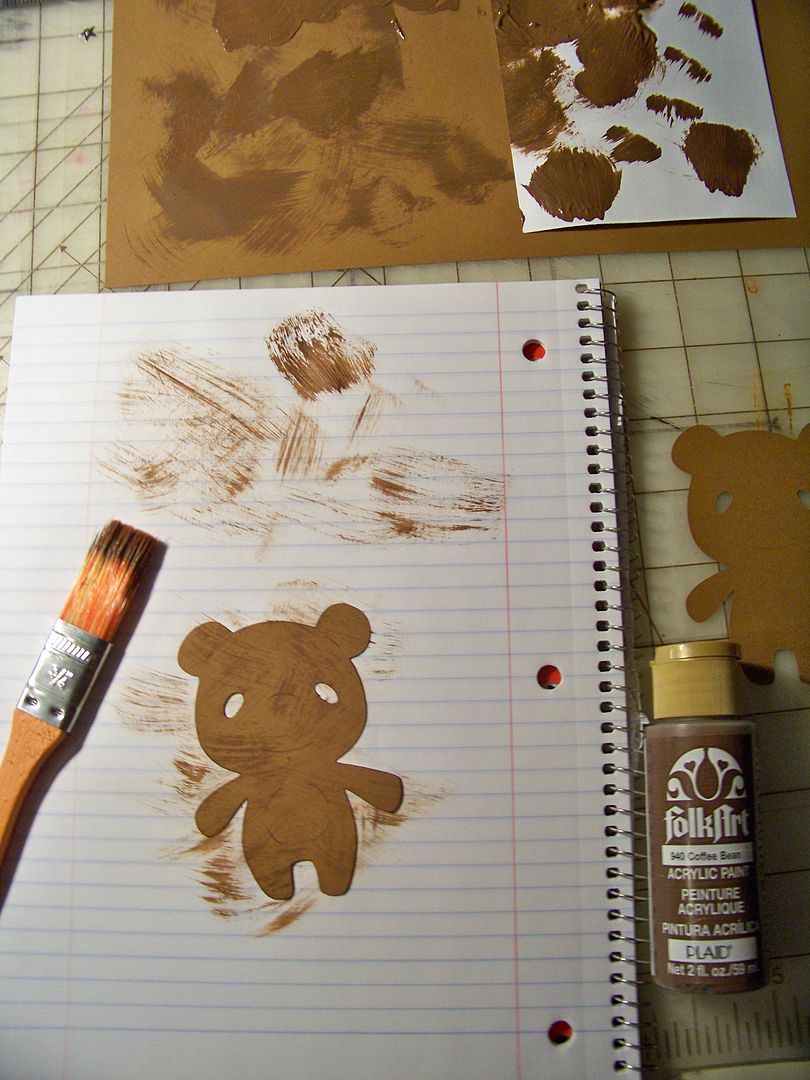
For dry-brushing, I just used a cheap nylon brush and acrylic paint...
For the panda, I used two base cuts, hand-cutting to remove legs, arms, ears, and to add big-ole panda eyes from the white layer. (I never used the panda in my note card set, but included him here anyway since I thought he was fun!)
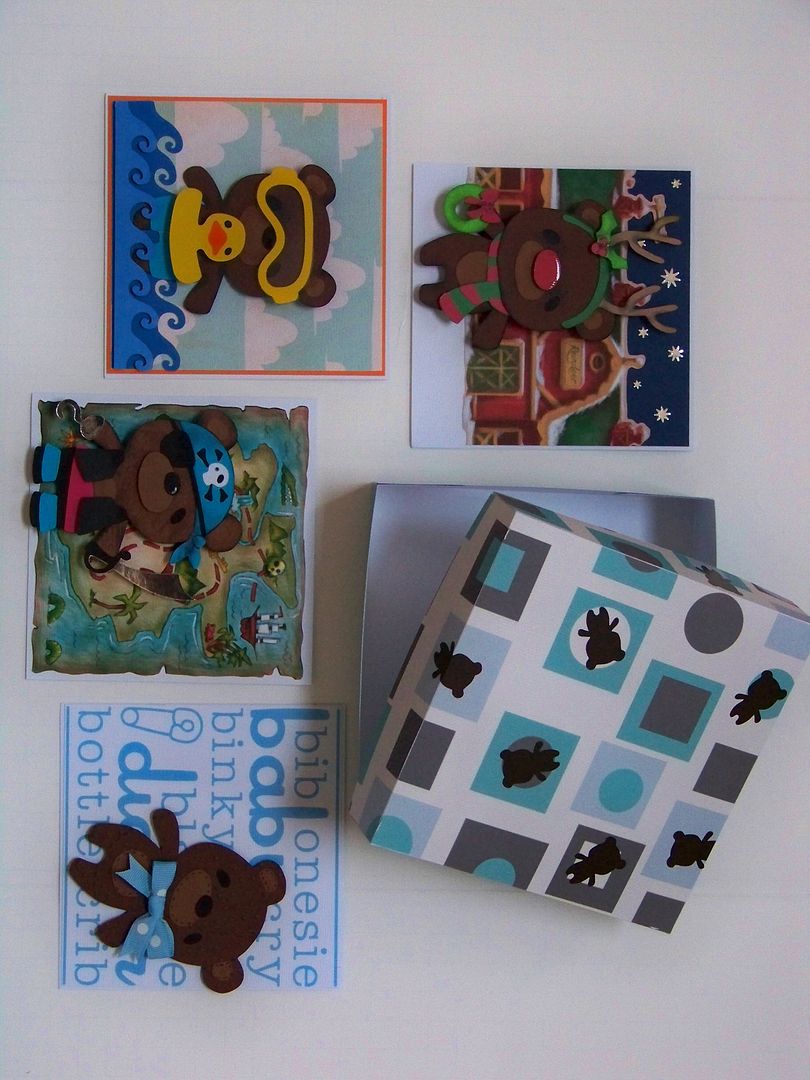
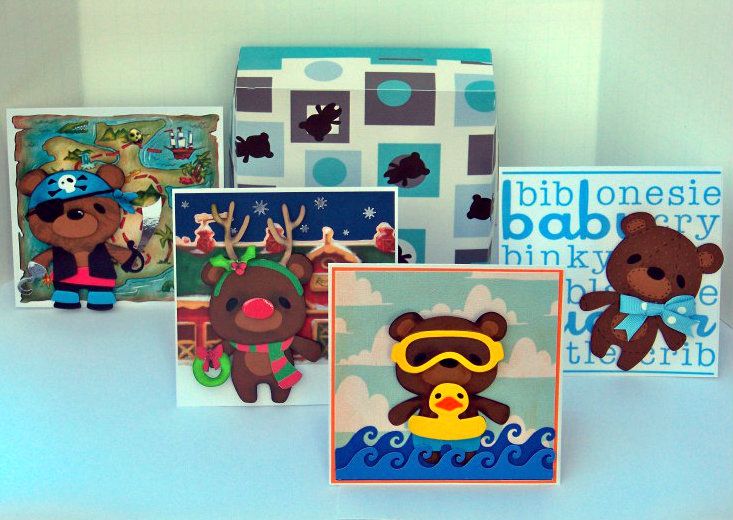
On to the note card set!
Each card finishes at 4-7/8" x 4-7/8". The simple reason for that: the manufactured envelopes I decided to use mandated my size! So for each card, I cut cardstock at 9-3/4" x 4-7/8", scoring to fold at the center.
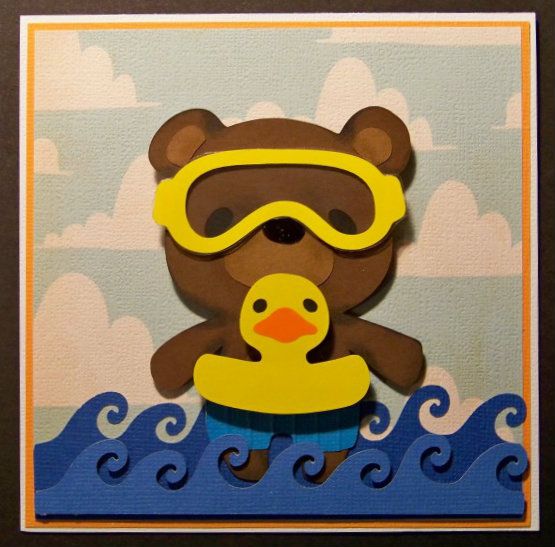
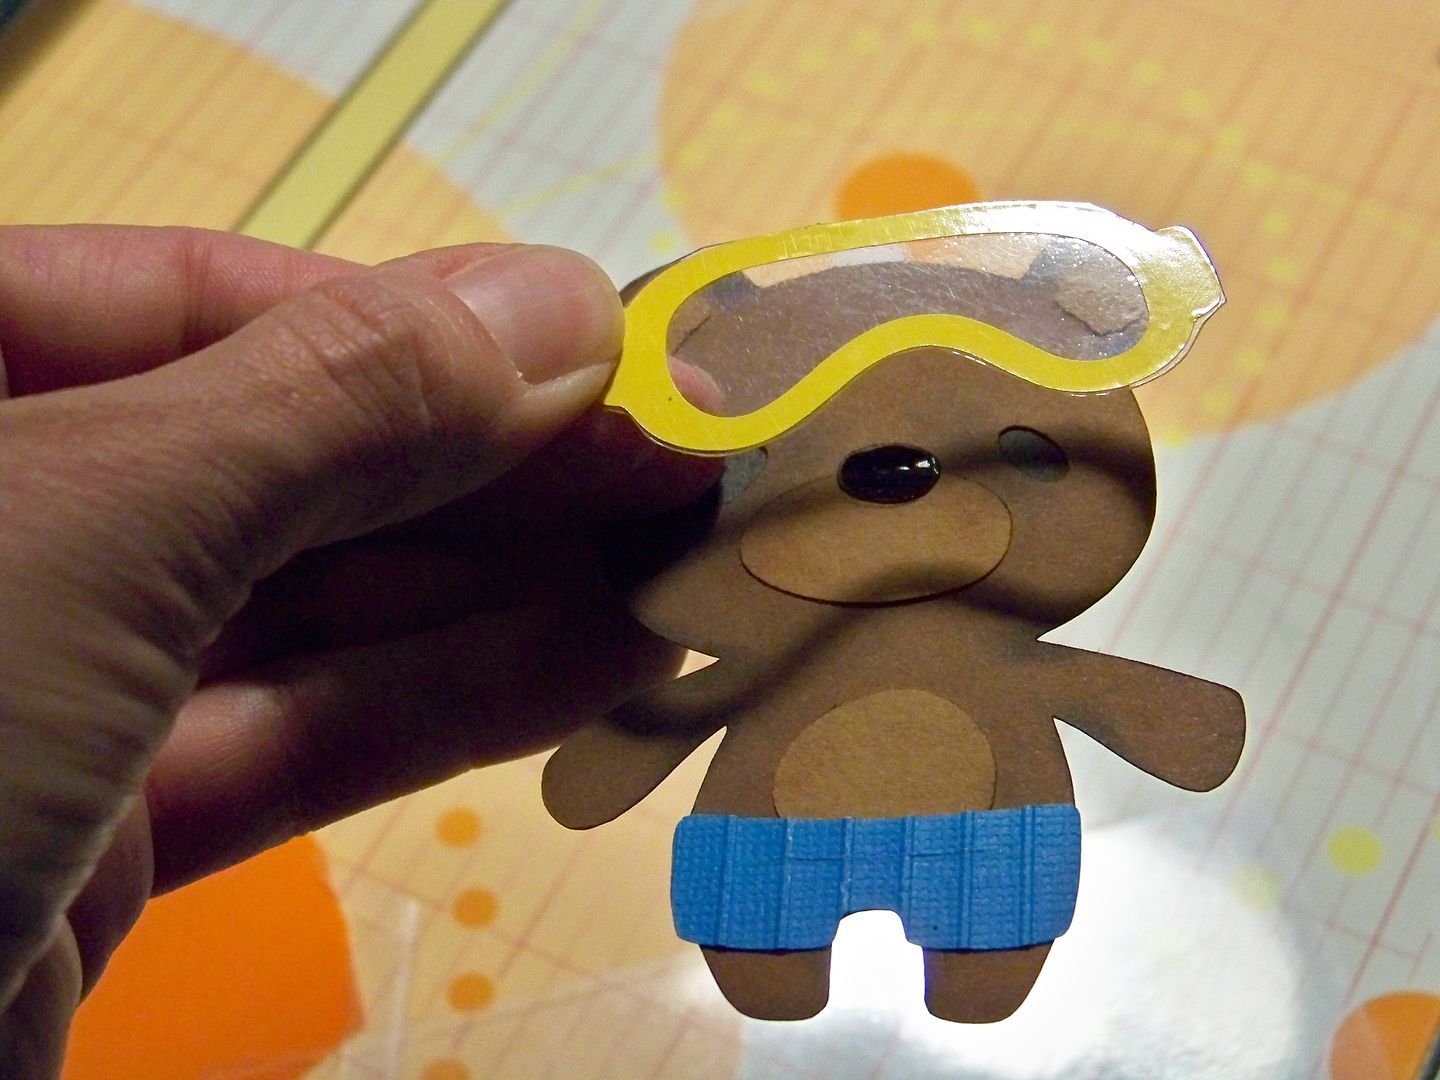
Beary Good Swimmer.... Okay, let's face it: it is hard not to use "beary" with this project. I am going to apologize now for that but I won't really stop!
Crafty Details for Beary Good Swimmer:
- Base mats cut at 4-5/8" square (clouds) and 4-3/4" square (orange).
- Bear cut at 3-1/2" from Teddy Bear Parade Lite Cartridge. (This is the one that was inked and has a shiny nose due to Glossy Accents. His swim shorts were embossed with a Cuttlebug stripe folder. The bear was popped up 3/8" at his head only; his lower body was adhered flush to the paper.
- Background (cloud) paper printed from Imagine Best Friends --trimmed down from a 9" square for that scale.
- Goggles and Duck floatie were cut from vinyl to get a plastic look! For the goggles, I placed the vinyl cut onto acetate (recycled from a cartridge clamshell) and hand-trimmed around it! The goggles are popped up 1/16". For the duck floatie, I placed the yellow vinyl directly onto the black paper base for that shape and accented with orange vinyl for the duck bill. The floatie is popped up 3/8".
- Water was cut from Ocean of Words (page 49) at 1-1/4". The top layer is popped up 1/16".
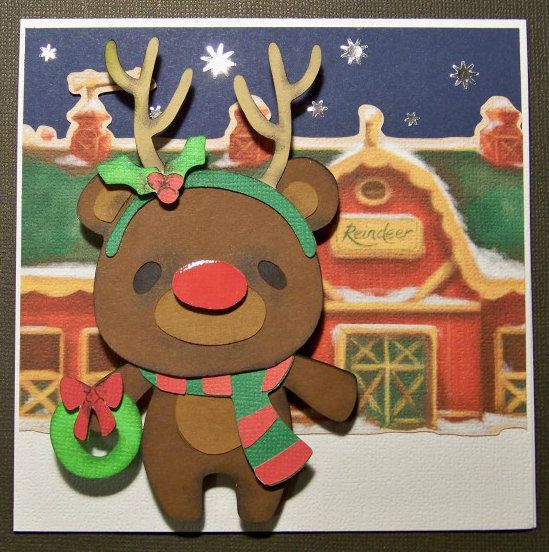
Beary Believable Rudolph...
Crafty Details for Beary Believable Rudolph:
- Base mat cut at 3-1/4" x 4-3/4" (dark blue sky).
- Bear cut at 3-1/2" from Teddy Bear Parade Lite Cartridge. (This is the bear with the re-attached head). Accessories were inked and accentuated with a micro pen. The "shiny red nose" was made that way with Glossy Accents! Nose and holly were popped up 1/16". Bear body was popped up 3/8".
- Building cut from Imagine Santa's Village at 3-1/2", trimmed down to fit a width of 4-3/4". The white of the card base was left uncovered at the bottom since it was snowy!

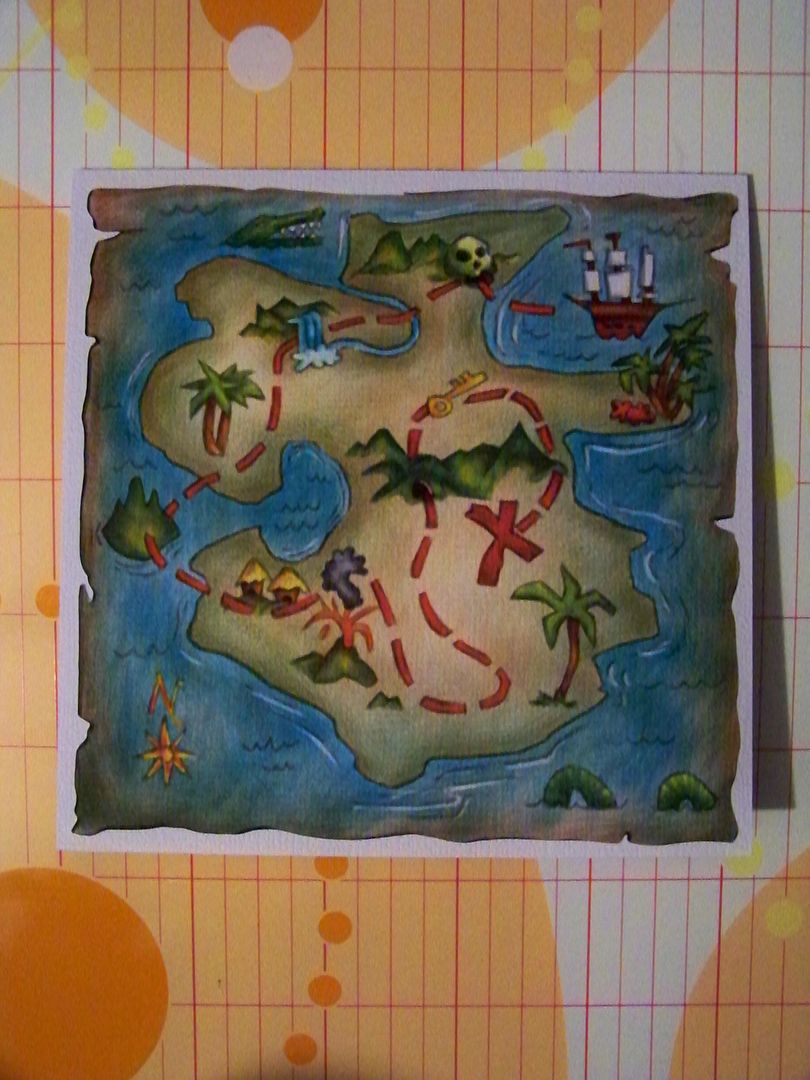
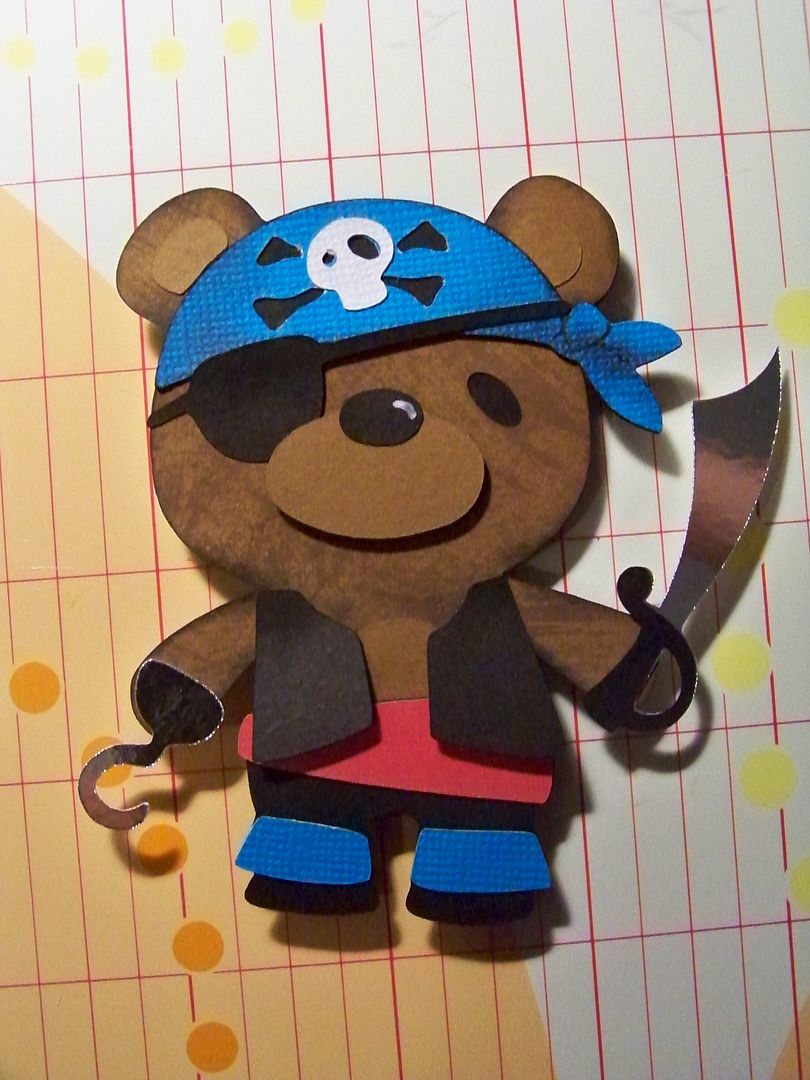
Arrrgg! Pirate Bear....

Crafty Details for Pirate Bear:
- Base was printed and cut from Buccaneer at 4.7" (map).
- Bear cut at 3-1/2" from Teddy Bear Parade Lite Cartridge. (This is the bear that was dry-brushed with brown paint). Scarf was inked in black with micro pen for details. The sword and hook were cut from metallic paper. His vest was glued flush at the shoulders and popped up 1/16" at the hem. Bear body was popped up 3/8".
For Beary Sweet Baby....
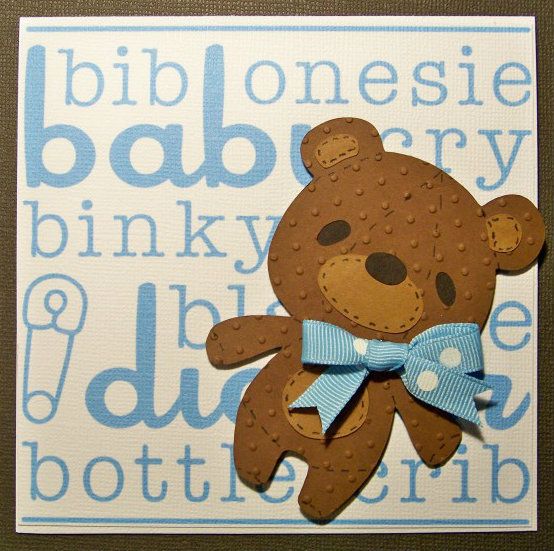
Crafty Details for Beary Sweet Baby card:
- Base mat was printed from Word Collage at 4.7" on my Imagine, and trimmed to 4-3/4". I used the 'print only' function, selecting a blue from the built-in colors.
- Bear cut at 3-1/2" from Teddy Bear Parade Lite Cartridge. (This was the bear that was embossed and "stitched" with micron pen.) Bear was popped up 1/8".
- Bow was glued with E6000 to ensure that it wouldn't pop off.
As you can see, as I progressed, my cards got a bit simpler! I realized that the Imagine cartridges were PERFECT for fast backgrounds! Making the bears first also helped me get ideas for the cards I would make later!
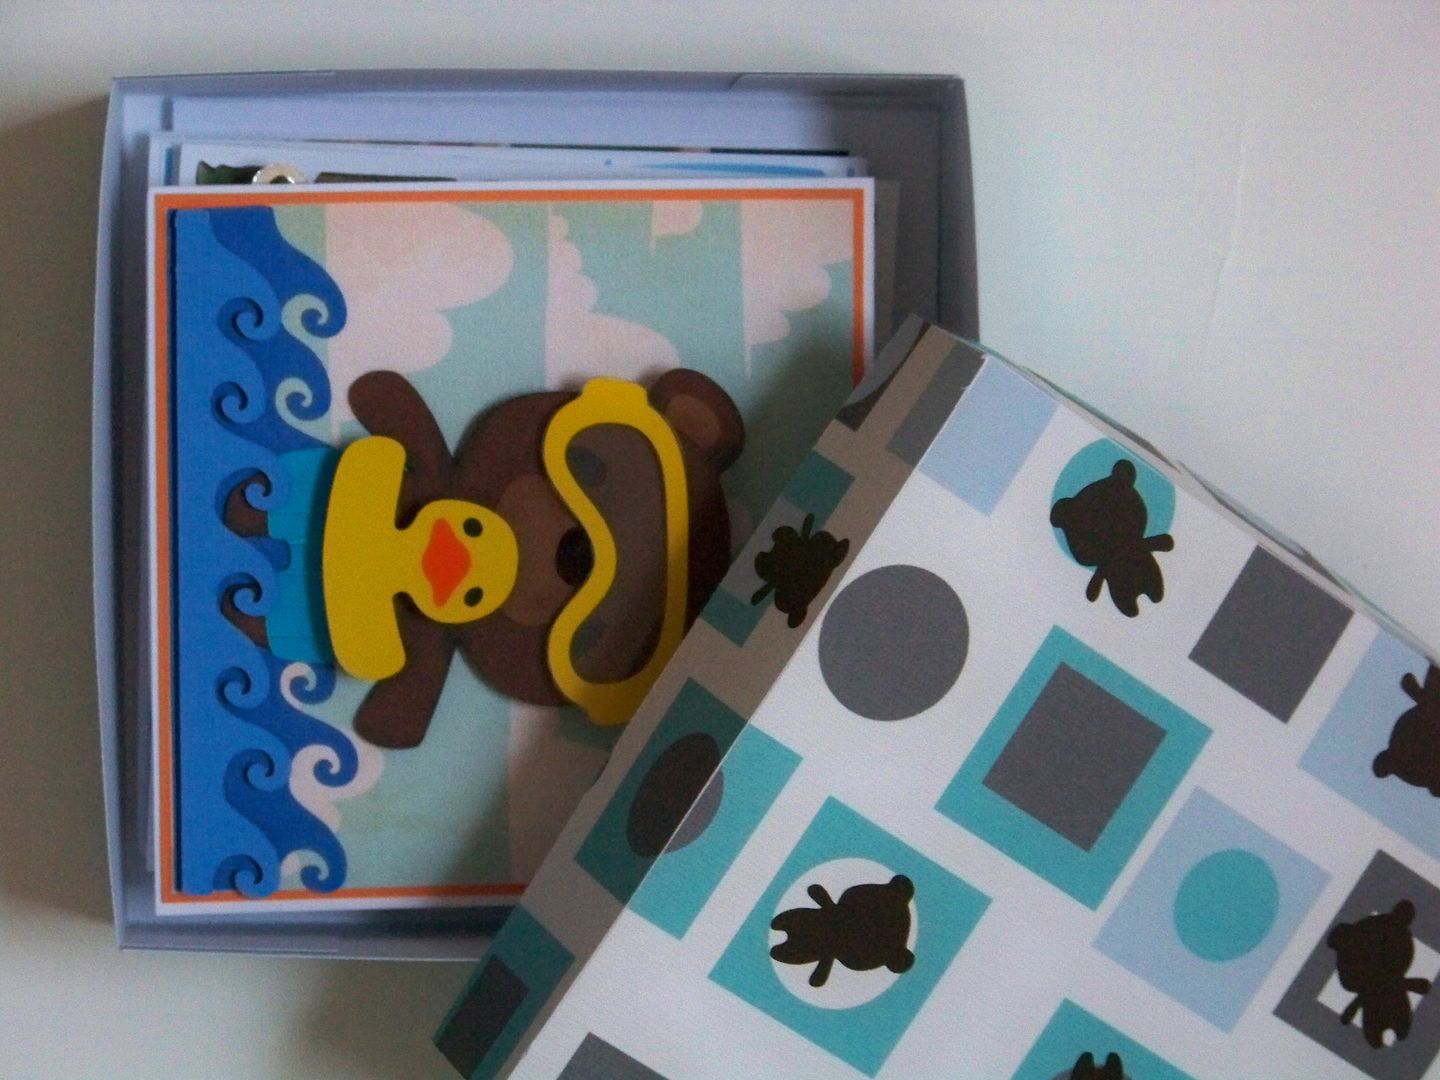
So.... I thought these would be a cute gift! I found a perfect box on Sweet Tooth Boxes!
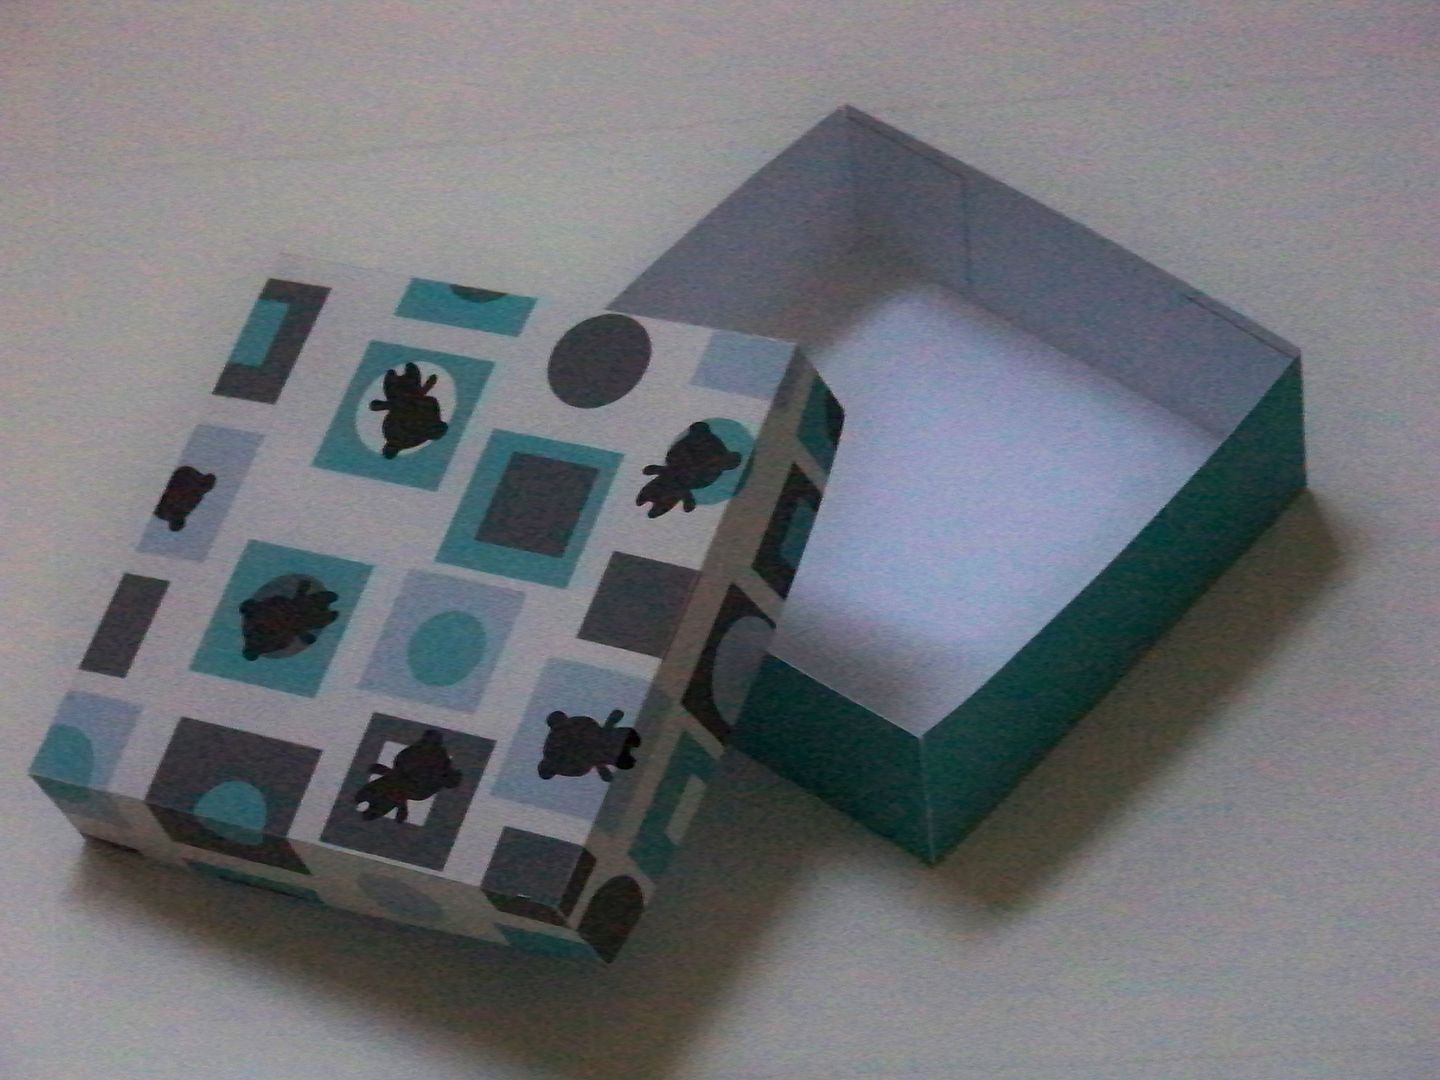
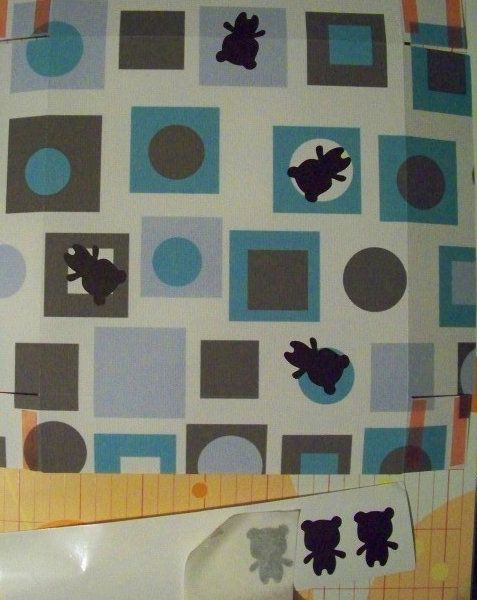
This box is from page 60 of Sweet Tooth Boxes, cut at 9-1/2" on the Expression. (To see my tip on hiding the tick marks on 3D cricut cuts, click here to see a previous post that explains that technique.) The papers for this were printed from Word of Mouth on my Imagine. I made it into 'bear paper' when I added bears by cutting matte brown vinyl bears at 1" (base bear cut on the Teddy Bear Parade cartridge). Transfer paper made it very easy to apply to the box lid after being cut but before being assembled.
This project was so much fun to make!! I hope you enjoyed this card set as much as I liked making it!
Thank you for checking my blog post today! You can see many of my previous paper projects by visiting My Project Gallery (or click here)!
28 comments:
Nadia these are sooo cute, I'm tempted to get the cart even though I've no very little grandchildren now. I really really love what you've done, your imagination and talent always amazes me! Beary well done, sorry couldn't resist that :-)
Your cards are adorable! I especially love the swimming bear. :)
SO CUte Nadia! I had a chance to get this cartridge yesterday and I froze, wasn't sure I needed it. Well after your post I think I do!
These are darling, I was working with my TBP cart yesterday too.
These are all so A-D-O-R-A-B-L-E!!! Great job! :)
I can bearly stand how stinking cute this is. Thanks so much for the bear tutorial - love dry brushed bear with white accent on nose!
Each card is so memorable and charming. Love your use of the Imagine papers - you totally stumped me on the box card print.
As always, wonderful use of materials (vinyl genius) and details.
Thank you!
Oh, Nadia...these are so stinkin' cute!!!! I LOVE the swimming bear...& the baby bear...& the pirate bear...get the picture????! I think it's safe to say that, IF your mojo was missin'...it's back now!!
Thank you for sharing this! I asked pc last year to make a bear cartridge, I did not know they had one.
These are absolutely adorable Nadia! Your creativity always amazes me. I may have to actually open this cart and try something with it! Thanks for sharing your project!
You are SO BEARY creative!! The bears are absolutely adorable and the backgrounds are just perfect.
Adding the vinyl bears to the box is just fabulous!! I love every part of this.
OMG I don't know which bear I love the most! Love the different ways you texturized each one ;). Looks like a must-have cartridge after all - thanks for the inspiration!
Nadia, you're awesome!!! This is the most adorable card set!!!
I love seeing what you do with my cartridges. You always find amazing ways to give my "cuts" more life, depth and dimension! Beary well done.
Oh my goodness Nadia these are absolutely amazing - love them all:-)
http://karonskraftykorner.blogspot.ca/
These are absolutely too cute! I loved this cartridge the day I saw it posted on the Cricut MB and now that I see your creations, I have to have it. Your details are amazing! Such a fun little set you created!
Nadia - Love your note cards gift box set -- it is just too cute!! This cart was a must have for me -- I'm a senior citizen who is still collecting teddy bears. I hope my bears turn out half as cute as yours!!
very cute cards! love the ideas for creating texture and making them look a little different, especially the panda!
All your cards are beary adorable:)
Awesome job as usual and great instructions.
Michelle
aka Gardengypsy on the CC MB
Cute, cute, cute, cute!!!!!!!
These are all sooooo cute Nadia! Love!
Just love this set, Nadia!! Love those little goggles and the pirate bear has to be my favourite!! Great work, yet again!
Nadia, saw you entered this cute little box over at Sheila's challenge!!! Everyone should love it, and thanks so much for sharing it!!!
Nadia, you have done it again! These are the best thing I have seen in a while. What an absolutely fun and creative set! Yep--I am waiting not so patiently for this one to go on sale. WHY???? ;) You are so fabulously talented! God bless and thanks for sharing!
Nadia, the Teddy Bears are too cute! I think that I may need this cart now. You are such an enabler. It's wonderful to look at things through your gifted eyes. Thanks for sharing with us.
Angela (TiffysMom)
Nadia, these are too cute! I love every bear card. Looks like I so need this cartridge. Thanks so much for sharing your talents with us!
Linda
Love all yoour bears! I am getting this cartridge for my bday....can't wait to combine with my other cartridges. Thank you so much for sharing your wonderfully creative ideas.
Toooooooo stinkin' cute!!! TFS! :-)
I never had a teddy when I was kid, either. However, my sweet hubby would buy me teddy stuffies. Then, he found an angel teddy bear. I was in heaven!!! :-)
this is a wonderful site like finding upon a treasure by accident.....I found u on the cricut site,I bought the teddy cart about a week ago and wanted some ideas ...yours are awesome!!! an all your cute details!!! hugs Jean
Post a Comment