
One of the first really great font digitizers that I found when I started embroidering was Stitchtopia! A few months ago, I bought a font that is perfect for Valentine's Day from Stitchtopia, called Hope. This is a font with alternate letters and some of those letters have hearts! (There is a Hope 1 and a Hope 2 so there are lots of choices of letters with swirls and hearts, as well as simple letters to place between fancy ones). I wanted to practice some things I had figured out after re-watching Embrilliance Stitch Artist videos and this font gave me some ideas. I decided to fill in the hearts with color!
I also wanted to add some tiny hearts to make a bit of a composition for a cosmetic-style bag for which I just found a great video tutorial! The bag features an easy zipper installation and a flat bottom. Put together, I ended up with a little Valentine bag for my sweet daughter, which will be the "wrapping" for her Valentine gift she will get next month.
For this project, I used my embroidery machine, my sewing machine, Embrilliance Essentials and Embrilliance Stitch Artist (embroidery software), in addition to the Stitchopia Hope 1 font..
Step 1: I wanted a background heart that would guide my composition. It won't show in the finished design but it will give a placement guide to fit the other shapes in. I clicked the Merge Design button to open the Shape Library to find a heart.

I selected this one.

The heart appears like this on the virtual hoop. I sized it to fit the hoop.

Step 2: I added my font. I clicked the "Create Letters" button to access the BX fonts that I have loaded to my Embrilliance software. I type these in using my keyboard all at once (that is the benefit of using Essentials and bx fonts!!)
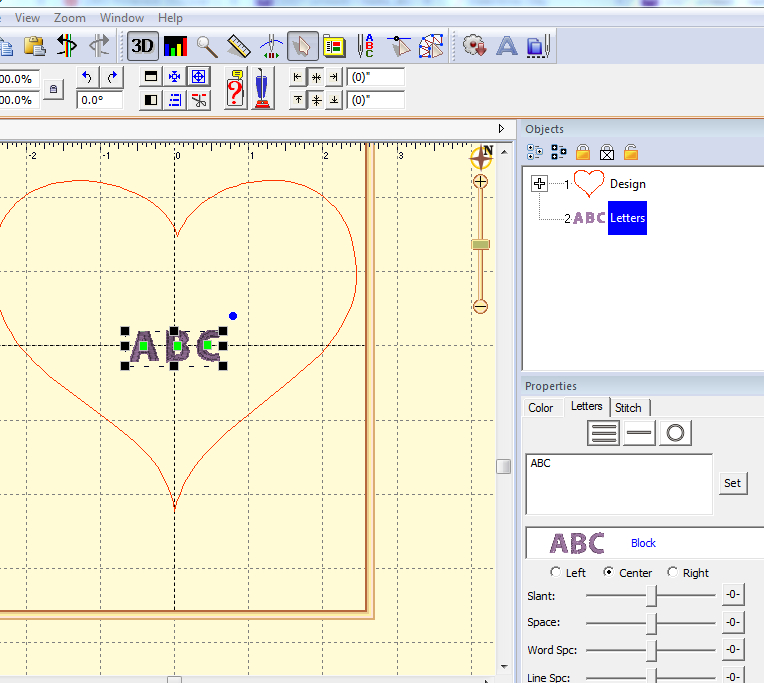
I decided that all the letters I needed were in Hope 1. I selected the alternate lower case "p" and the alternate lower case "r". Stitchtopia files that contain alternate letters always include a key to instruct as to which characters are mapped to the alternates and a guidesheet. This makes it easy to pick my letters.

In the case of the letters I chose using the key, Pi@e$ was simply typed in the Properties text box to get this combination that used these two hearts. I used the spacing sliders to connect the letters so that they appear as connected script.

With the text selected, I clicked the "Center Designs in Hoop" and "Fit to Hoop" buttons to size and place the text.

Step 3: I created a fill behind the text hearts. I did this by selecting the Create button to access the Stitch Artist tools. I used the "Draw With Points" button to outline the heart on the inside edge of the heart. I close the shape by selecting "Open/Close
The first time I tried this, I placed the points just inside the satin stitching of the letter....thinking that I would avoid too much overlap... forgetting that most hidden stitches are removed by the program.

But after my test stitch out, you can see that it was a mistake to do that. There is a gap between the fill stitch and the satin stitch of the font.


I wanted to avoid those gaps I got on my test stitch out!! I made the same adjustment on the bottom heart.
And I also did one other thing... I adjusted the density of the font that I had added previously. I hated to do that because I adore the way that Stitchtopia fonts stitch out all by themselves, but I wanted to make sure that those gaps were gone and if the fill stitched under the font, I wanted to be sure it wouldn't show! I need to do some kind of experiments on this, but today I just picked this out of the air and went with 9%. I was able to do this by selecting my font in the objects pane and then selecting 'stitch' in the properties pane and moving the slider from 0% to 9%. Again, was was just a guess based on absolutely nothing. (Adjusting the density is another feature of Embrilliance Essentials!)
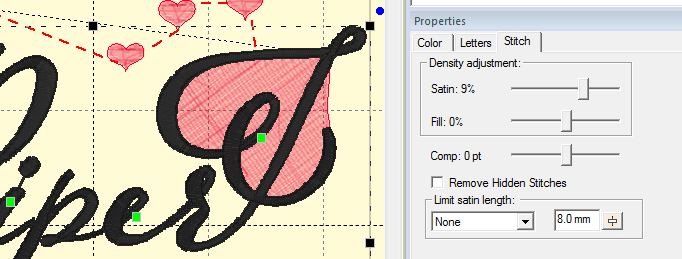
I am not even sure that this was absolutely necessary, but I share this with you in the case that it is helpful. I really loved the result of the more dense letters with the filled hearts.
I will show you more about the differences in my test stitch outs in step 7.
Step 4: I added small hearts I digitized. I used the same heart from the library that I used at the start of the process, but sized them down to be accents. I just copied and pasted and used the large outline to guide the placement. I highlighted each one at a time and added fill by selecting the fill button.

Step 5: Change stitch order and reduce jumps. I moved the hearts around a bit on the objects pane (by selecting each and right clicking and selecting the "move earlier" direction) so that they would stitch in order around the composition and not in the haphazard order I placed them on the virtual hoop! Then, I changed the stop and start points on all the hearts to reduce jumps as much as possible. Although I knew I would still have jumps, I did not want them to go through the font since the hearts would stitch first and if I waited to trim the jumps, I didn't want them trapped under the stitches of the font. To do this, I just moved the red and green bowties (the stops and starts).


Step 6: Remove the background. Since I no longer needed the large heart outline now that my design has been placed, I selected it on the object pane and clicked delete.

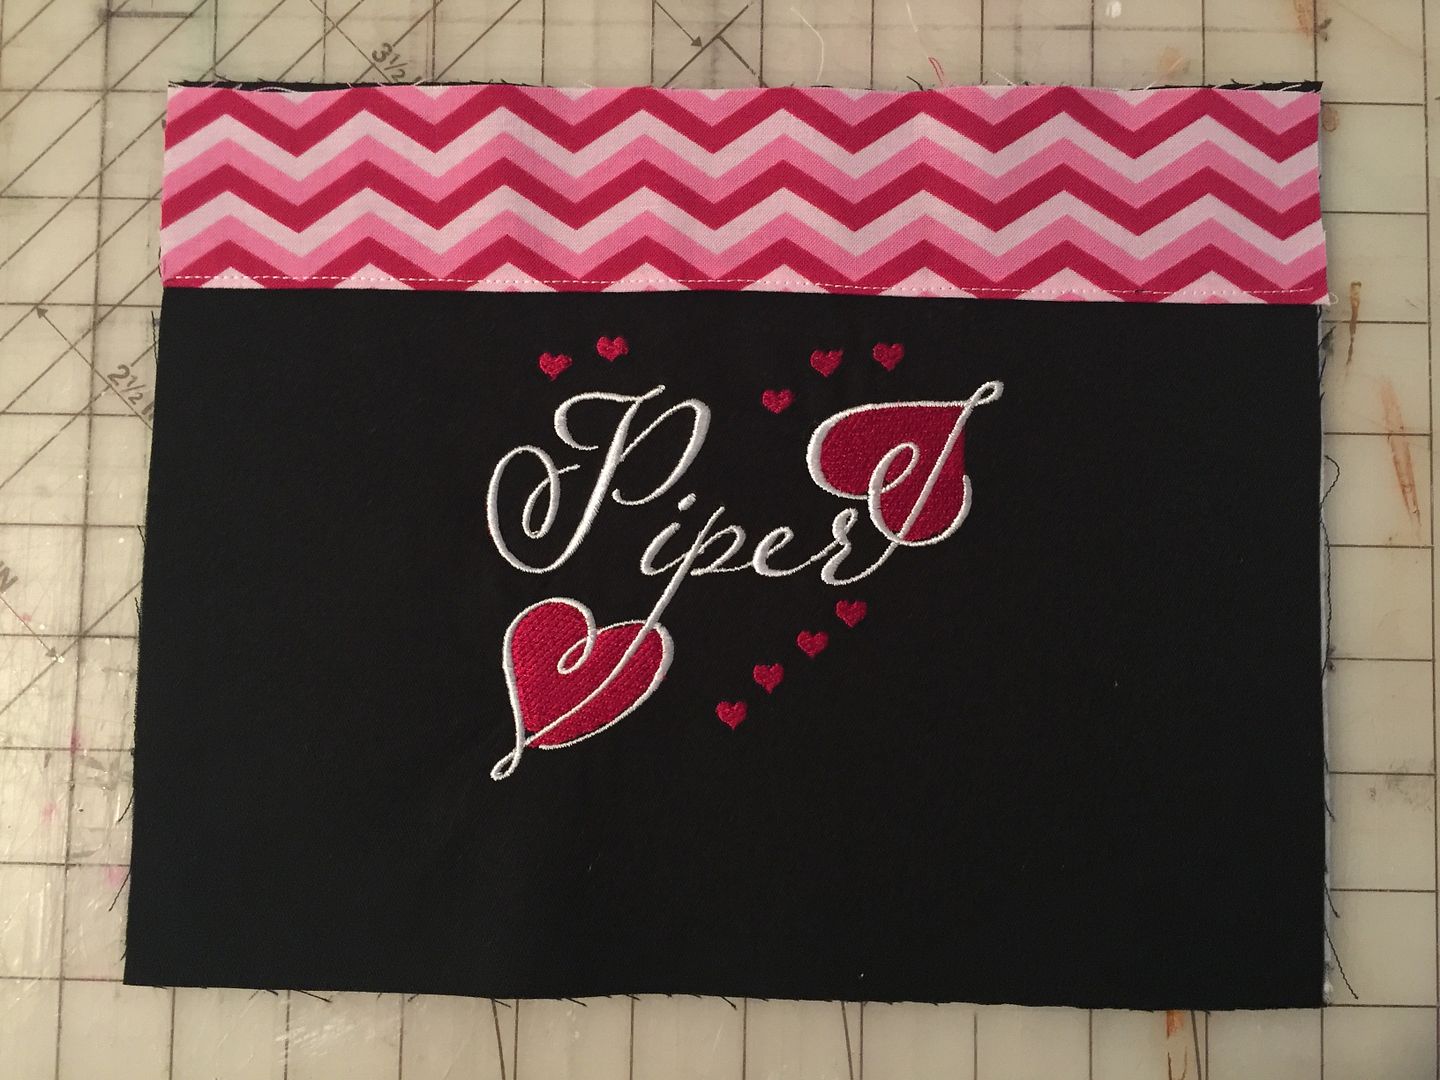
Step 7: Test stitch out. I have already partially shared this above but this is the difference between my first test and my second (after I made my changes with the points and the font density).

The first test stitch out showed me my giant mistake of the gap between the fill and the font, but it also showed me that I didn't like the black-on-white so I switched to a white-on-black. I also made teeny changes to the tiny hearts. Because they were elongated a bit, they looked like they had an extra stitch at the bottom to me, so I made them squattier.
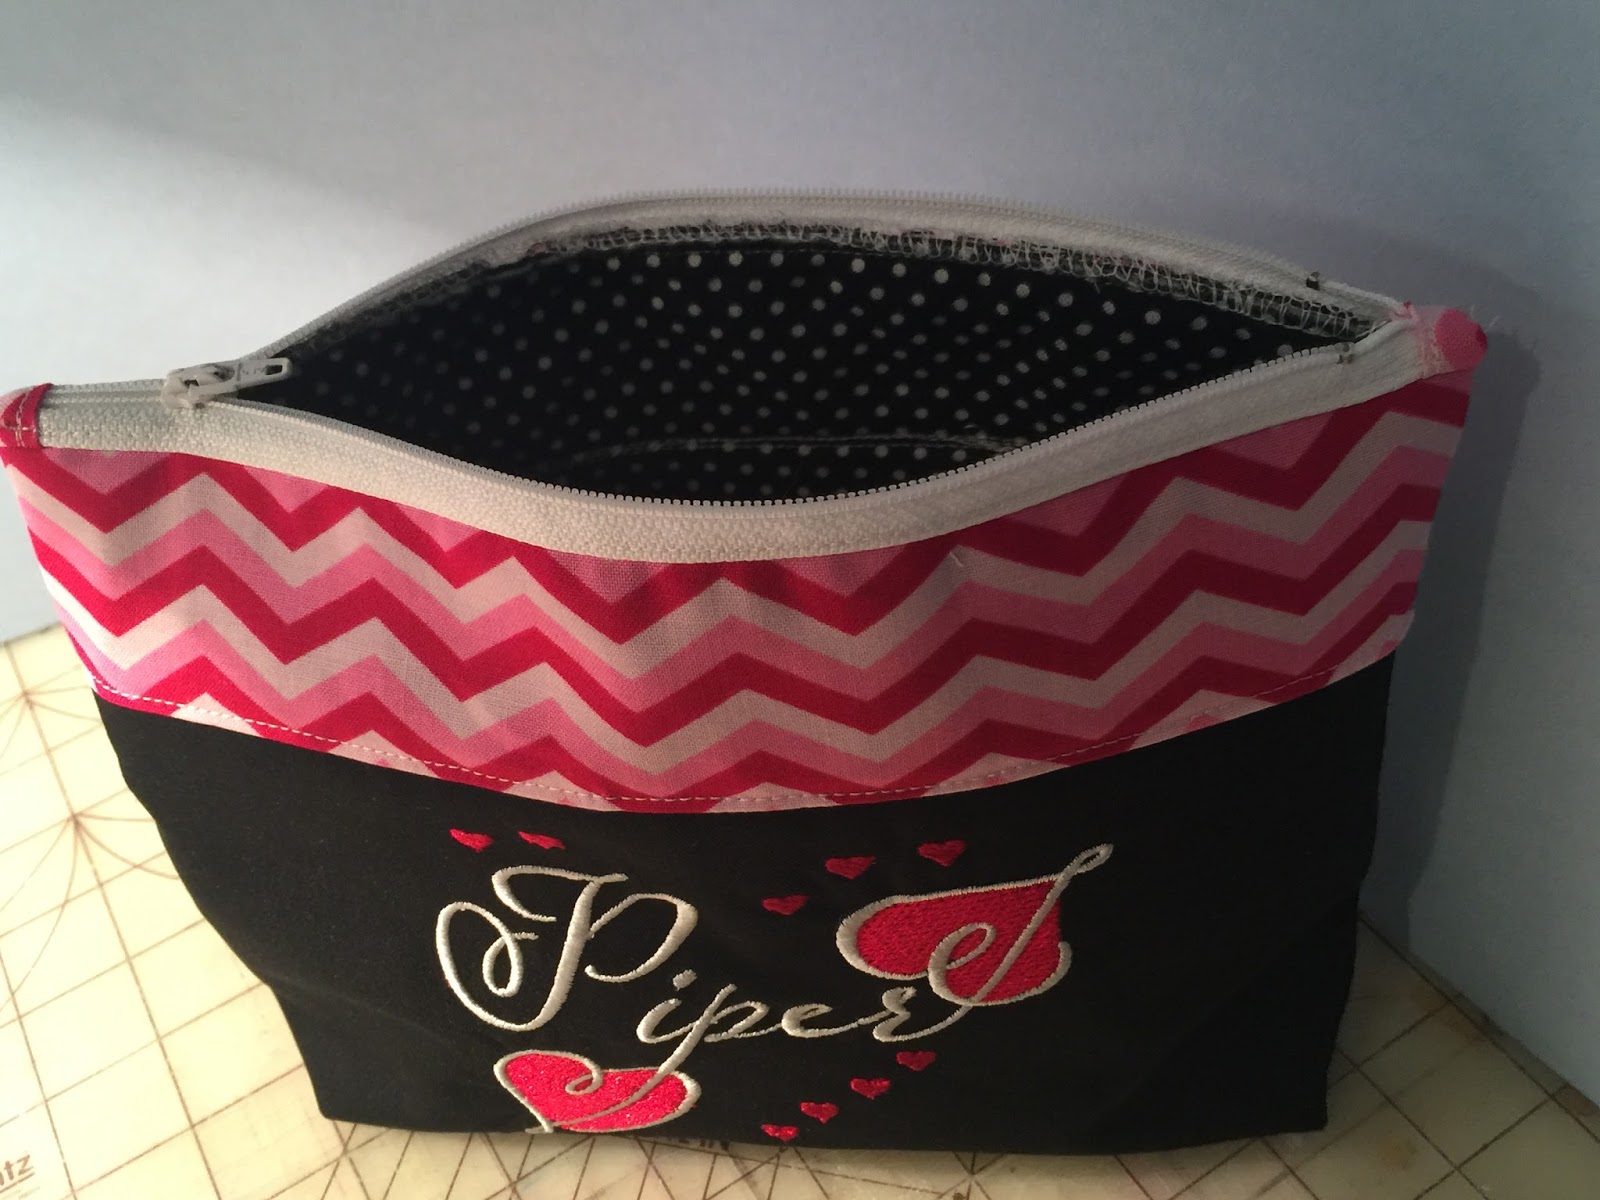
Step 8: Sew up the pouch. I used a video tutorial from the Missouri Star Quilt Company to sew this super, super easy project. This is not an in-the-hoop pouch, but rather a pouch sewn on a sewing machine. The tutorial tells you everything to do, including how to sew in a zipper and how to square the bottom so that the pouch is self-standing. It is completely customizable in size and you can add any fabrics and even trims! I added my embroidery to the black fabric before it was sewn on the others so that the wrong side of the stitching is hidden inside.
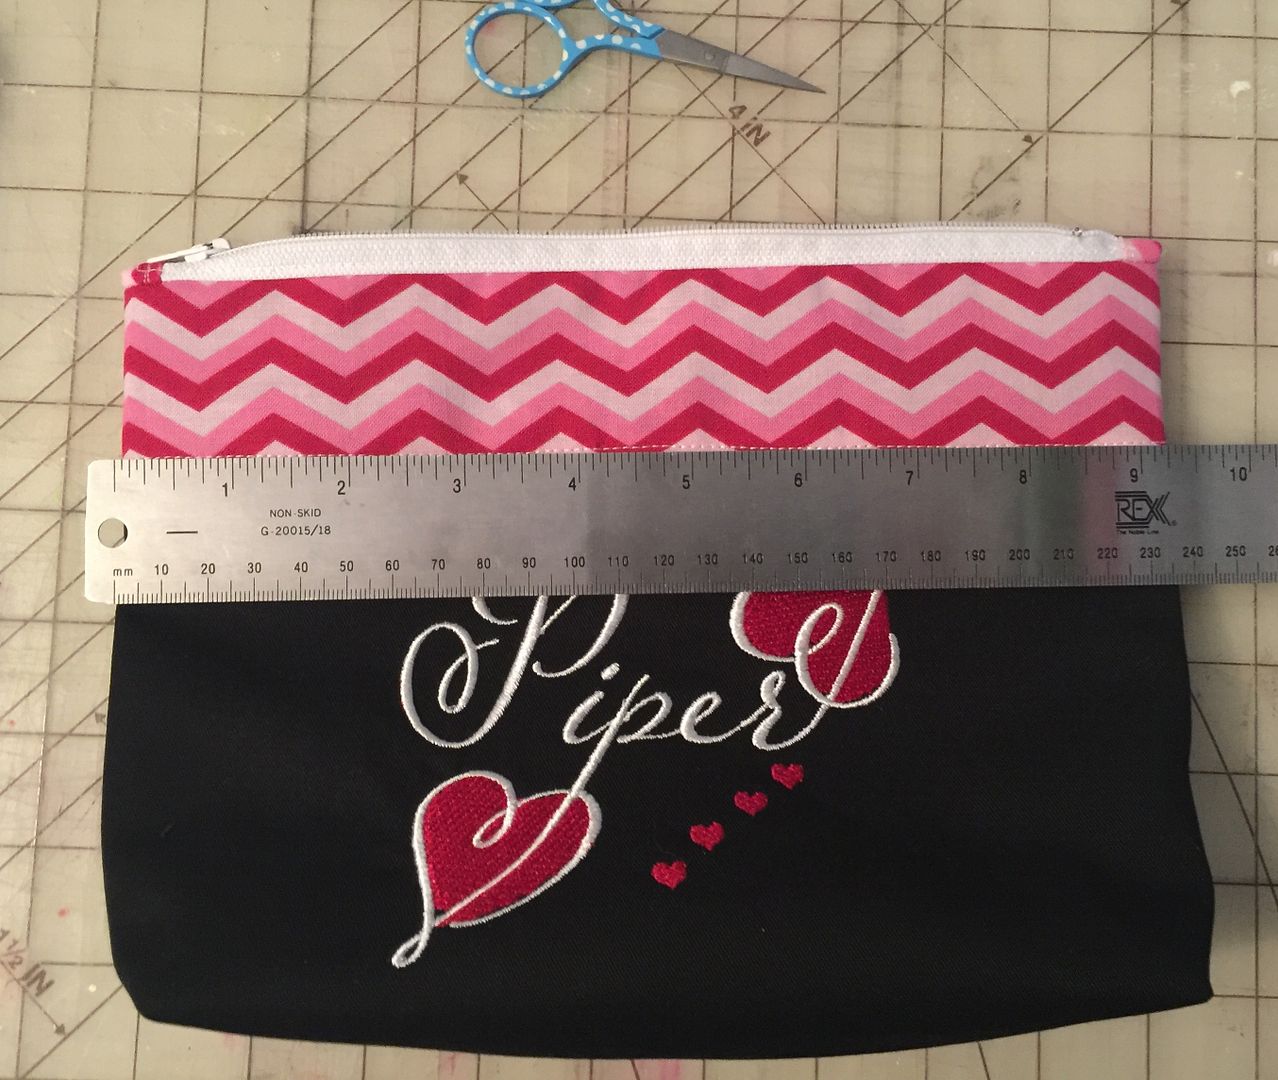
I trimmed down my fused, pieced front and back bag pieces to 10-1/4" across by 8" down. I started with a base piece that was roughly 25" by 9". I only mention that because you can really make these any size so I was just trying to accommodate my embroidery while making a bag large enough to put small gifts inside!
I added the zipper and sewed it according to the tutorial.
This is unconstructed in that it is not truly lined as the face pieces are sewn onto the back of the batting-fused lining, but the inside is still fun. Unlike her tutorial, I did serge all my inside seams. This bag took just minutes to make-- so incredibly fast and easy!
It finished at 9-1/4" across.
Step 9: Zipper Pull Charms: I beaded rocailles and glass beads on headpins and added charms with split rings.

I used half of a circle-and-bar closure and joined that to the zipper's pull with a split ring. These were just things from my stash. When my daughter was tiny I used to make her jewelry with clay beads I bought. She had necklaces for every color of outfit and for every occasion so it was fun to pull those out again.

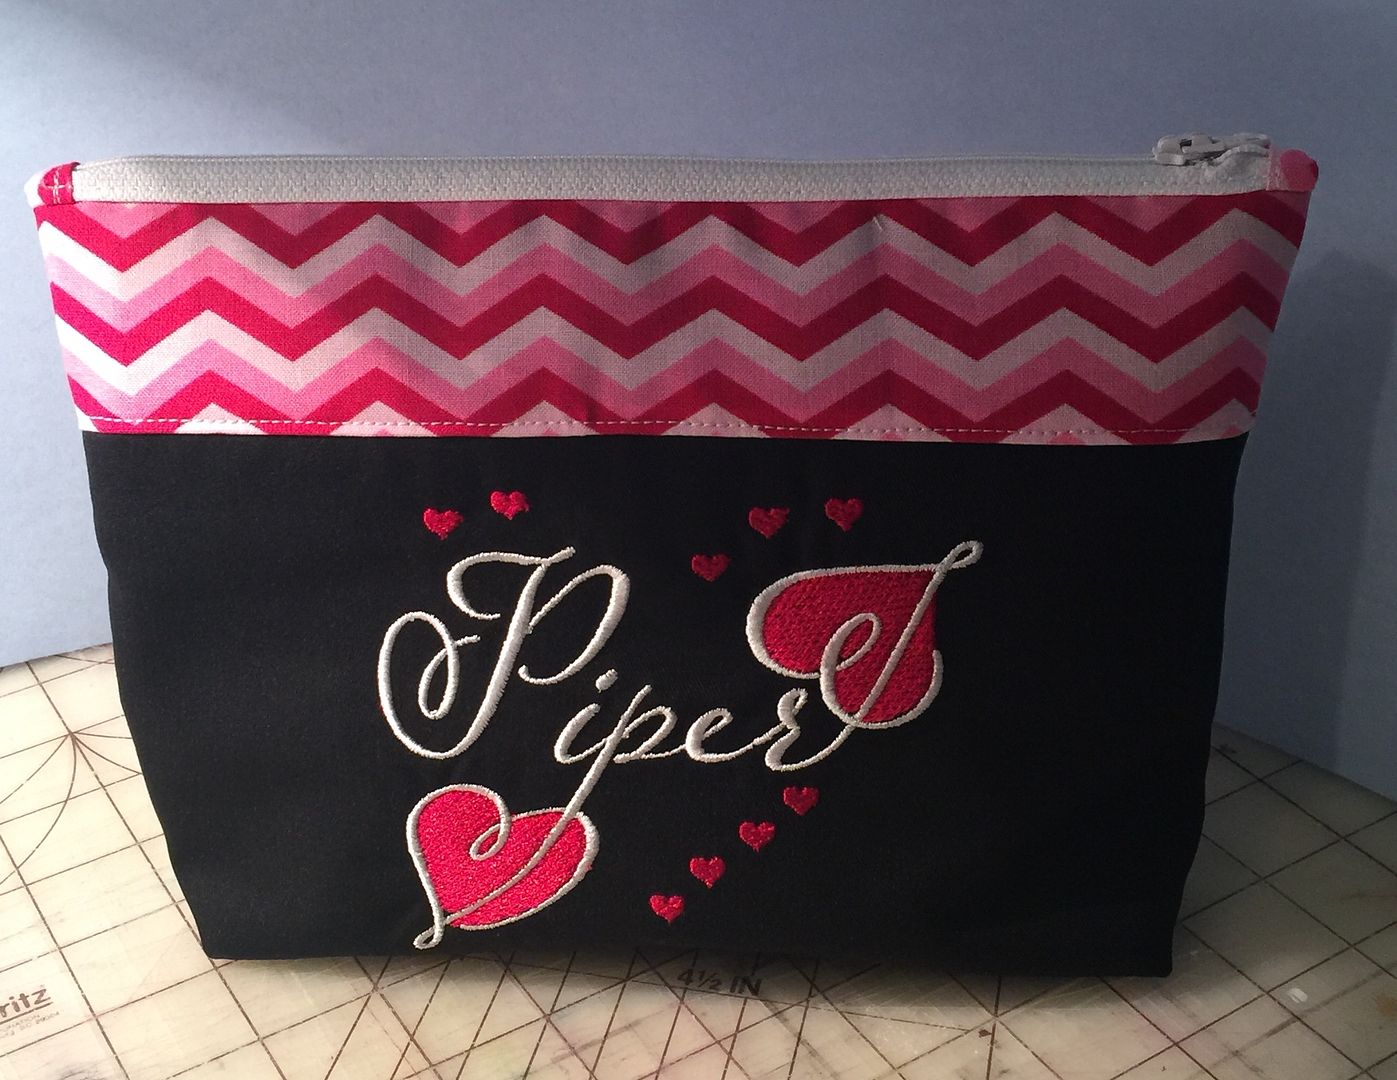
This is the finished pouch...ready to be filled with fun Valentine gifts!

List of links used in this post (none of these are affiliate links; they are all direct links):
- Stitchtopia Hope 1 font in 1", 2", 3" size: click here. When you select which file format you would like when purchasing, you will also get the BX file format at no additional cost included with the download!
- Embrilliance Essentials: click here.
- Embrilliance Stitch Artist: click here.
- Video tutorial for the pouch sewn on the sewing machine: click here.
Thank you for looking at my post! I have tons of projects in my Gallery that include papercraft, sewing, and baking including these VALENTINE projects:
- Valentines featuring Rainbow Loom bracelets
- Photo Valentines, Dressed up Candy Boxes, Religious Valentines, and Sewing a Valentine Doll Dress and Shoes!
- Valentine Doll Pinafore to Sew Plus Accessories
- Hershey's Valentines
- Dolly and Me style Valentine Cards, Printable Vinyl Doll T-shirt, and Upcycled Doll Clothes
- Valentine Gift Packaging, Fudgy Brownies, and Alfajores (caramel cookies)
For more info on machine embroidery, check out my Embroidery page by clicking the tab at the top of the blog or by clicking here.
3 comments:
I love this! I am sure Piper will treasure it! I don't have an embroidery machine yet, but I can appreciate the super tutorial. As always, a great post.
Super cute valentine day gift for your daughter! Oh, the anticipation waiting for the days till you can give it to her! I'm so impressed you were able to get this done weeks before Valentine's Day! I love the tutorials at MSQC too, this looks like a great one. You are an excellent seamstress! I just loved the extra touch with the zipper pull charm! Thanks for the really detailed step by step instructions on how you did the embroidery part. I'm definitely learning a lot!
Great tutorial! Although I use Embird, your information is very helpful to me. Thank you!
Post a Comment